Week 1 Self Study Devlog - Barrel and Richmond Bridge Models
This Week's Self-Study: Getting Started in Blender
Part 1: Creating a 3D Barrel Model
This week's self-study involved following a tutorial to model, UV unwrap, and texture a wooden barrel in Blender. The tutorial provided a step-by-step process for creating a game-ready asset while reinforcing key 3D modelling and texturing techniques.
Tutorial: https://www.youtube.com/watch?v=HggtU6Nzlao
Modelling the Barrel
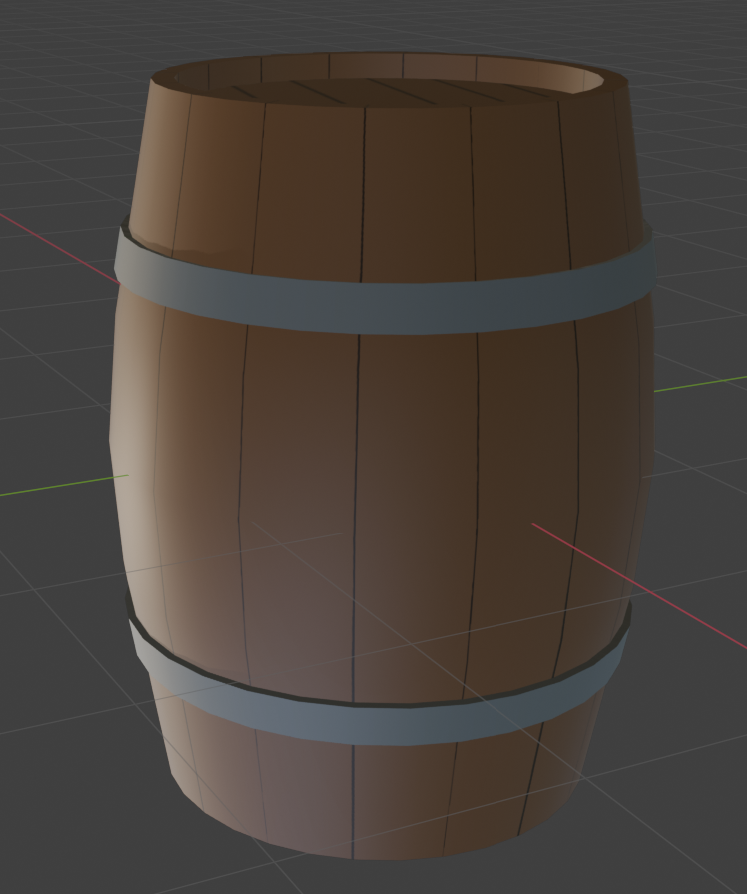
The process started with a cylinder mesh, which was modified to create the distinct barrel shape. I added edge loops along the height of the cylinder and scaled the vertices outward to form the classic curved profile of a barrel. To create the metal bands, I duplicated part of the mesh, scaled it, and positioned it around the barrel. I also added faces to close off the top and bottom.
UV Unwrapping and Seams
Once the basic shape was complete, I marked seams along the model to prepare for UV unwrapping. This helped prevent texture stretching and ensured a clean, even distribution of the texture. By carefully placing seams, I created a UV map that allowed for better control when applying materials and painting details.
Texturing and Painting
I assigned a material and applied a brown base texture to the barrel. To further refine the look, I used masks to separate different areas, allowing me to paint distinct colours onto the wood and metal bands. Using the brush tool, I manually painted details that resembled individual planks, adding more depth and realism to the final result.

The final result of the 3D barrel model created in Blender after modelling, UV unwrapping, and texturing.
Challenges and Learning Outcomes
During this tutorial, one of the main challenges was UV unwrapping and seam placement. Initially, some areas of the texture appeared stretched due to uneven UV scaling. To fix this, I had to carefully adjust the seams and unwrap the model again to ensure a more uniform texture distribution.
Another challenge was painting realistic wood details. Using masks helped separate different parts of the barrel, but manually painting plank details with the brush tool required experimenting with brush settings to achieve a natural look. Getting the strokes to align properly across the UV map was tricky but improved with practice, although I still wouldn’t consider it particularly realistic-looking.
One of the biggest difficulties I faced during this tutorial was the difference in Blender versions between the tutorial and the one I was using (Blender 4.3.2). Many buttons, menus, and fields had been moved, renamed, or removed entirely, making it frustrating to follow along. Simple actions like enabling Auto Smooth, adjusting UV settings, and switching from Material to Single Image in Texture Paint Mode were not where the tutorial showed them. This forced me to spend a significant amount of time searching for solutions. The majority of my time was not actually spent modelling or texturing, but rather figuring out where the required settings had been moved. I was only able to continue by asking AI and searching online for updated instructions, which made the process much slower and more frustrating than expected.
Part 2: Richmod Bridge Model
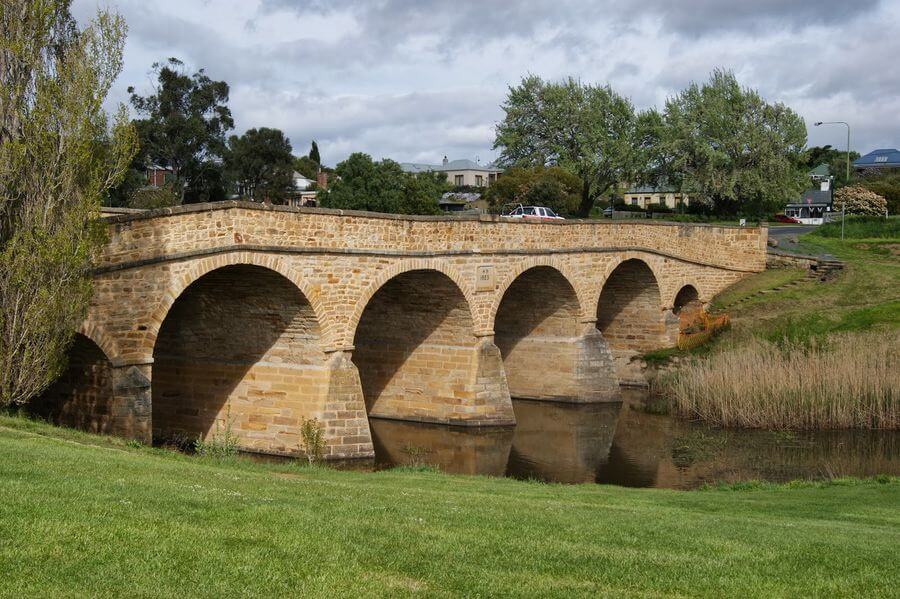
After completing the 3D barrel model, I moved on to another self-study task: creating a simplified version of Richmond Bridge, Australia's oldest stone arch bridge. Rather than focusing on creating a highly detailed or accurate model, I approached this as an opportunity to develop my skills in Blender, particularly in modelling and UV unwrapping.

Image of the Richmond Bridge, used as a source of inspiration, Credit: www.thelodge.com.au
Modelling Process
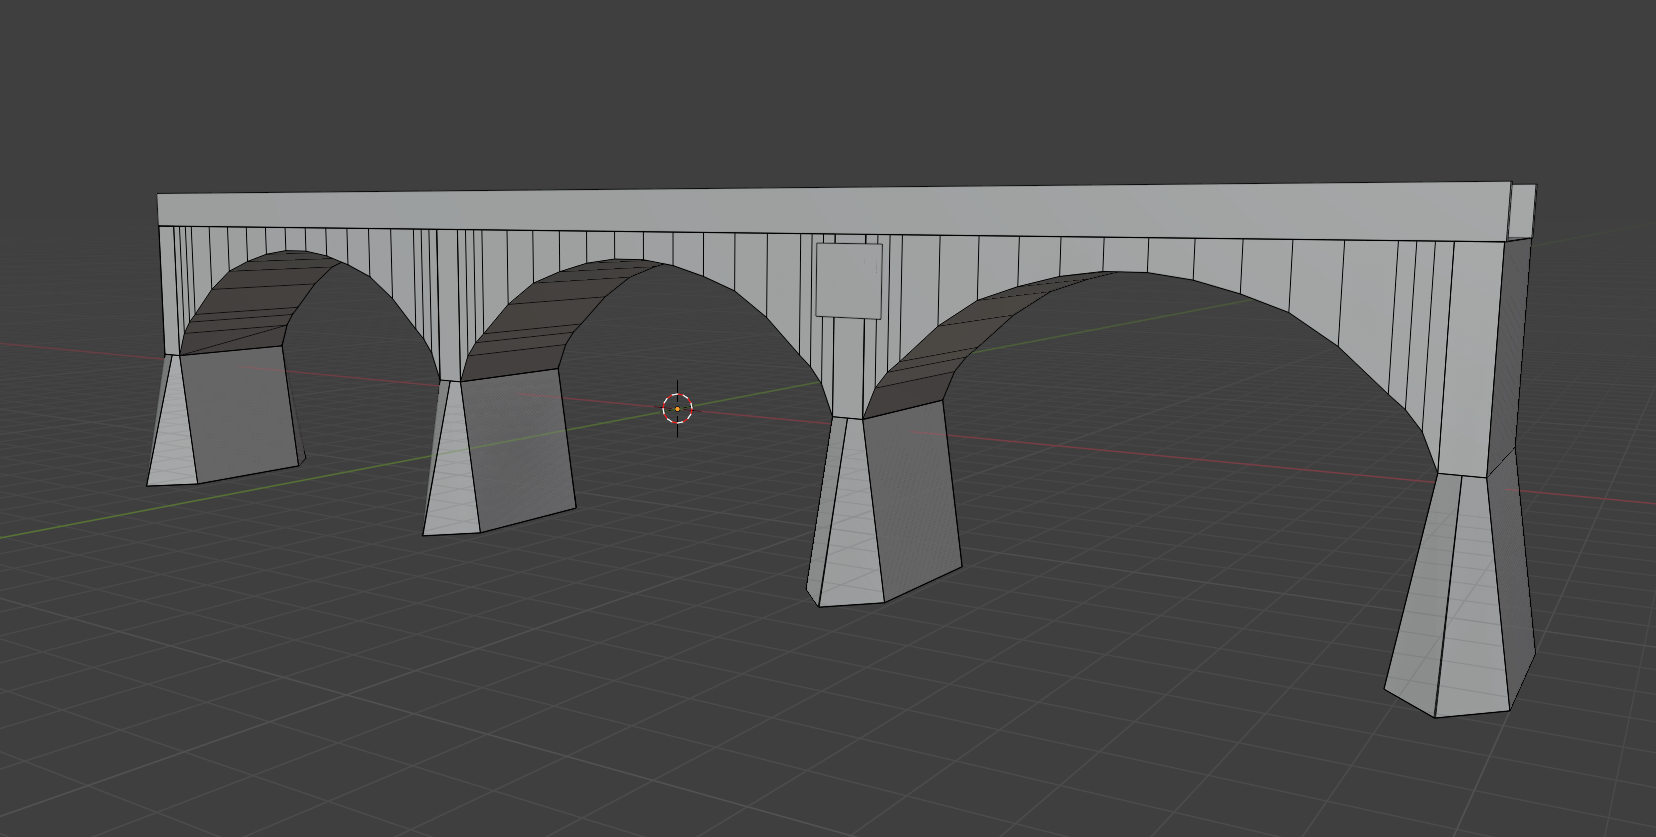
I started with basic shapes to 'block out' the general structure of the bridge, including the pillars, arches, and road surface. Since this was a learning exercise, my focus was on understanding how to manipulate geometry effectively rather than accurately reflecting the proportions, so the model is in no way to scale.
One of the biggest challenges was creating the arched openings. I initially attempted a Boolean operation to cut the arches but ran into issues with messy geometry. Instead, I used edge loops and vertex adjustments to manually shape the arches, which resulted in a cleaner and more predictable outcome.
Once I had one archway, I used mirroring and duplication to extend the bridge, avoiding unnecessary repetition in modelling. After that, I added side walls and a road surface, keeping everything fairly simple while experimenting with different modelling tools.
UV Unwrapping and Unexpected Issues
The next step was UV unwrapping, which turned out to be much trickier than I expected. Because the bridge had curved surfaces and multiple connected parts, getting a clean, non-stretched UV layout required lots of trial and error. Seam placement was crucial—badly placed seams led to distortion in the UV map, and checking for stretching using overlays helped identify problem areas. Upon reflection, I suspect the UV unwrapping was always going to be difficult with this choice of object to model.
Duplicate Geometry Issues
After unwrapping, I noticed strange shading artifacts in certain areas. Upon closer inspection, I found duplicate faces and vertices overlapping in several places—likely due to past mistakes when extruding, duplicating, or merging objects.
This caused issues such as:
- Unexpected Z-fighting (flickering surfaces).
- Trouble selecting edges or faces properly.
- Broken UVs (due to Blender reading overlapping geometry?).
I attempted to fix it by using "Merge by Distance," which cleaned up many unnecessary vertices, but some areas still required manual deletion. The extent of these duplicate elements made it clear that my workflow needed improvement to avoid this excess geometry buildup in future projects. At this point, I decided to stop and abandon the model, as I realised that properly finishing the UV unwrapping and texturing would require restarting the entire model from scratch. The amount of duplicate geometry and structural issues made it clear that further work would be pointless, highlighting the need for better planning and cleaner modelling practices from the beginning.
Lessons Learned
- A structured approach is clearly essential for modeling. Jumping in without planning led to avoidable mistakes.
- The Boolean tool is be unreliable (or perhaps I was using it incorrectly). Manually shaping objects often produces better geometry.
- Checking for duplicate geometry early is a must. Overlapping faces can cause major issues down the line.
- UV unwrapping is a skill that takes loads of practice. While I made progress, it’s still something I need to work on.
Final Thoughts
This exercise reinforced core Blender skills and helped me get more comfortable with basic modelling techniques and troubleshooting issues. While the final result was far from perfect (or even finished), it was a valuable learning experience and helped build confidence in working with more complex 3D models. Assuming I have the option, I wouldn’t include this model in my portfolio, it ended up being primarily a learning exercise rather than any kind of final product.

The final result of the Richmond Bridge
AI-assistance was used in this Devlog for spelling, grammar, and minor sentence structure refinements. The content, ideas, and wording remain my own, ensuring that this devlog accurately reflects my personal work and learning experience.
Leave a comment
Log in with itch.io to leave a comment.